
AI Video Studio with Claude Code + Remotion
🛠 Build it: 1. Setup & your first skill · 2. The script-writing skill · 3. The editing skill · 4. The local AI story skill · 5. The comedy script skill
🎬 Use it: Talking-head video · AI story video · Deadpan comedy video
🔬 Under the hood: Architecture · Subtitles · Jump cuts · Music & SFX · Local AI pipeline
This series builds an AI video studio you run from your terminal. You type something like /tiktok-script "a proverb" in Claude Code, and a skill writes a filmable script. You record a few clips, type /tiktok-video, and get a finished vertical MP4 with jump cuts, word-by-word subtitles, music and sound effects. Or you type /ai-story "a fable" and get a narrated, illustrated video without touching a camera at all.
By the end of the series you'll have built four Claude Code skills and two Remotion compositions:
| Skill | What it does | Built in |
|---|---|---|
tiktok-script | A quote or opinion → a 30–45 s talking-head script plus a shooting guide | Part 2 |
tiktok-video | Your clips + the script → an edited MP4: jump cuts, animated subtitles, music, SFX | Part 3 |
ai-story | A fable → a narrated video with AI illustrations, generated entirely on your Mac | Part 4 |
votri-script | A saying or a pickup line → a deadpan comedy script exported as a print-ready PDF | Part 5 |
The finished source for everything in this series is public at github.com/siri2moon/claude-remotion-video. You can follow along from scratch, or clone it and use the posts as a guided tour. If you only want to use the skills, jump to the "Use it" guides in the series list above.
This first part lays the foundation: installing the tools, creating the project, wiring up Remotion, and building a small but complete skill — hello-video — that goes from a one-line idea to a rendered MP4. Every later skill is a bigger version of the same loop, so it's worth getting this one working end to end.
What you need
- macOS on Apple Silicon is recommended. Parts 1–3 and 5 work on any OS with Node and FFmpeg; Part 4 (local AI illustrations) uses Apple's MLX framework and needs an M-series Mac with at least 16 GB of memory.
- Node.js 20 or newer and pnpm.
- FFmpeg — audio extraction, silence detection, format conversion.
- Claude Code with a Claude subscription or API access.
- Google Chrome — Part 5 prints PDFs with headless Chrome.
Step 1: Install the tools
# FFmpeg, plus uv (a fast Python package manager, needed in Part 4)
brew install ffmpeg uv

# pnpm, if you don't have it
npm install -g pnpm

# Claude Code
npm install -g @anthropic-ai/claude-code
claude --version
Run claude once in any folder and sign in. That's all the setup Claude Code needs.
Step 2: Create the project
The project has one folder per concern. Make it now; every part of the series fills in one piece of it.
mkdir video-studio && cd video-studio
git init
mkdir -p .claude/skills content/_assets out remotion/src
video-studio/
├── .claude/skills/      ← your skills, one folder each
├── content/             ← one folder per video: scripts, footage, intermediate files
│   └── _assets/         ← shared music, sound effects, voice samples
├── out/                 ← finished MP4s
├── remotion/            ← the Remotion project (React components that render video)
└── CLAUDE.md            ← project rules Claude reads at the start of every session
Video work produces large files that can always be regenerated. Keep them out of git from day one:
# .gitignore
node_modules/
.DS_Store
out/
remotion/.remotion/

# raw footage and intermediate files — large, regenerable
content/*/raw/
content/*/audio/
content/*/images/
content/*/media.json
content/*/timing.json
content/*/props.json

# speech-recognition binaries and models (Part 3), Python venv (Part 4)
.whisper/
.ai-story/
Step 3: Set up Remotion
Remotion renders video from React components. Each component receives the current frame number and returns what that frame should look like. You can scaffold a project with npx create-video@latest, but setting it up by hand takes five small files and shows you exactly what each one does.
remotion/package.json — pin every @remotion/* package to the same exact version; mixing versions is the most common source of strange Remotion errors.
{
  "name": "video-studio-renderer",
  "private": true,
  "type": "module",
  "scripts": {
    "studio": "remotion studio --public-dir=../content"
  },
  "dependencies": {
    "@remotion/cli": "4.0.512",
    "@remotion/google-fonts": "4.0.512",
    "react": "^19.0.0",
    "react-dom": "^19.0.0",
    "remotion": "4.0.512"
  },
  "devDependencies": {
    "@types/react": "^19.0.0",
    "typescript": "^5.8.2"
  }
}
remotion/tsconfig.json
{
  "compilerOptions": {
    "target": "ES2022",
    "lib": ["ES2022", "DOM"],
    "module": "ESNext",
    "moduleResolution": "bundler",
    "jsx": "react-jsx",
    "strict": true,
    "noEmit": true,
    "skipLibCheck": true,
    "esModuleInterop": true,
    "resolveJsonModule": true,
    "isolatedModules": true
  },
  "include": ["src", "remotion.config.ts"]
}
remotion/remotion.config.ts
import { Config } from '@remotion/cli/config';

Config.setVideoImageFormat('jpeg');
Config.setOverwriteOutput(true);
remotion/src/index.ts — the entry point Remotion looks for:
import { registerRoot } from 'remotion';
import { RemotionRoot } from './Root';

registerRoot(RemotionRoot);
The fifth file, Root.tsx, registers your compositions. You'll write it in Step 6 together with the first composition. Install the dependencies now:
cd remotion && pnpm install && cd ..
One design decision to make early: Remotion's public folder is content/. Every render passes --public-dir ../content, so a component can load staticFile('<video-folder>/raw/s1.mov') or staticFile('_assets/bgm/lofi.mp3') directly, with no copying. We set it on the command line rather than in remotion.config.ts because a relative path in the config depends on the current directory, which differs between the Studio and the render scripts.
Step 4: Install Remotion's official agent skills
Remotion publishes its own skills for coding agents, covering composition structure, animation, captions, rendering, and documentation lookup. Your skills will lean on them whenever a component needs changing, so install them:
npx skills add remotion-dev/skills
This adds skills such as /remotion-best-practices, /remotion-markup, /remotion-captions, /remotion-render and /remotion-docs. The rule you'll follow in every skill of this series: your skills describe your pipeline; Remotion's skills describe Remotion. Never copy framework documentation into your own skill — it goes stale the day Remotion ships a new release.
Step 5: Write CLAUDE.md
CLAUDE.md at the project root is loaded into every Claude Code session in this folder. Keep it short and put only project-wide rules in it; anything specific to one skill belongs in that skill.
# Video studio

Vertical 9:16 videos (1080×1920, 30 fps) built with Claude Code skills + Remotion.

## Rules
- Use pnpm, never npm/npx, inside remotion/.
- One folder per video: content/<YYYY-MM-DD>-<HH>-<MM>-<slug>/. Always create it with the
  skill's new-dir.mjs script — never type a date or time yourself.
- The JSON file a skill writes is the source of truth. Files generated from it (.md, .pdf,
  props.json) are never edited by hand.
- Before editing anything in remotion/src/, read /remotion-best-practices.
Step 6: How a Claude Code skill works
A skill is a folder under .claude/skills/ with a SKILL.md file. The file starts with YAML front matter:
---
name: hello-video
description: What it produces, when to use it, and the phrases a user would type.
---

# The procedure, written for Claude
Three things are worth knowing before you write one:
- The description is what Claude sees first. At the start of a session Claude only knows each skill's name and description; it loads the full body when the skill is invoked (
/hello-video) or when your request matches the description. So the description must say what the skill produces and include the words a user would naturally type. - The body is a runbook, not documentation. Numbered steps, exact commands, hard rules. Claude follows a short, precise procedure far more reliably than a long essay.
- A skill can carry files. Put long guidance in
references/and tell Claude at which step to read it. Put deterministic work — creating folders, validating, rendering — inscripts/, and tell Claude to run them. Claude does the creative part; scripts do the exact part.
Everything in this series follows one loop:
flowchart LR
    A[Your request] --> B[Claude follows SKILL.md]
    B --> C[new-dir.mjs creates the folder]
    C --> D[Claude writes one JSON file]
    D --> E{validate.mjs}
    E -->|ERROR| D
    E -->|OK| F[render.mjs → Remotion]
    F --> G[out/video.mp4]
Step 7: Build your first skill — hello-video
hello-video turns an idea into a short vertical video where three to six lines of text animate in one after another. It's deliberately small, but it has every part the real skills have: a folder convention, a JSON contract, a validator, a render script and a Remotion composition.
7a. The composition
remotion/src/HelloVideo.tsx — shows a title at the top and one line at a time in the middle, each in its own Sequence:
import { AbsoluteFill, interpolate, Sequence, spring, useCurrentFrame, useVideoConfig } from 'remotion';
import { loadFont } from '@remotion/google-fonts/BeVietnamPro';

// The 'vietnamese' subset is required, or accented letters render as boxes.
const { fontFamily } = loadFont('normal', { weights: ['800'], subsets: ['vietnamese', 'latin'] });

export type HelloProps = { title: string; lines: string[]; secondsPerLine: number };

const Line: React.FC<{ text: string }> = ({ text }) => {
  const frame = useCurrentFrame();
  const { fps, durationInFrames } = useVideoConfig();
  const enter = spring({ frame, fps, config: { damping: 14 } });
  const exit = interpolate(frame, [durationInFrames - 8, durationInFrames], [1, 0], {
    extrapolateLeft: 'clamp',
    extrapolateRight: 'clamp',
  });
  return (
    <AbsoluteFill style={{ justifyContent: 'center', alignItems: 'center', padding: 80 }}>
      <div
        style={{
          fontSize: 96,
          fontWeight: 800,
          color: '#FFE14D',
          textAlign: 'center',
          lineHeight: 1.25,
          textWrap: 'balance',
          opacity: exit,
          transform: `translateY(${interpolate(enter, [0, 1], [60, 0])}px) scale(${interpolate(enter, [0, 1], [0.9, 1])})`,
        }}
      >
        {text}
      </div>
    </AbsoluteFill>
  );
};

export const HelloVideo: React.FC<HelloProps> = ({ title, lines, secondsPerLine }) => {
  const { fps } = useVideoConfig();
  const slot = Math.round(secondsPerLine * fps);
  return (
    <AbsoluteFill style={{ backgroundColor: '#0B0B0F', fontFamily }}>
      <div style={{ position: 'absolute', top: 180, width: '100%', textAlign: 'center', color: '#fff', fontSize: 56, fontWeight: 800 }}>
        {title}
      </div>
      {lines.map((text, i) => (
        <Sequence key={i} from={i * slot} durationInFrames={slot}>
          <Line text={text} />
        </Sequence>
      ))}
    </AbsoluteFill>
  );
};
A few Remotion basics are on display here. Inside a Sequence, useCurrentFrame() counts from zero at the sequence's start, and useVideoConfig().durationInFrames is the sequence's own length — which is why the same Line component can fade out at the right moment no matter which slot it's in. spring() gives the entrance a natural overshoot; interpolate() with clamping handles the fade. And Math.round matters: secondsPerLine can be 3.3, and Remotion needs whole frame counts.
remotion/src/Root.tsx — registers the composition and lets the props decide the length:
import { Composition } from 'remotion';
import { HelloVideo, type HelloProps } from './HelloVideo';

const placeholder: HelloProps = { title: 'Xin chào', lines: ['Chưa có props'], secondsPerLine: 2 };

export const RemotionRoot: React.FC = () => (
  <Composition
    id="HelloVideo"
    component={HelloVideo}
    width={1080}
    height={1920}
    fps={30}
    durationInFrames={60}
    defaultProps={placeholder}
    // The video is as long as the props say: one slot per line.
    calculateMetadata={({ props }) => ({
      durationInFrames: Math.max(1, props.lines.length) * Math.round(props.secondsPerLine * 30),
    })}
  />
);
calculateMetadata is the key idea for everything that follows: the composition's length comes from its input data, not from a hardcoded number. Preview it now with cd remotion && pnpm run studio — the Studio opens in your browser with the placeholder props.
7b. The folder script
Every video lives in content/<YYYY-MM-DD>-<HH>-<MM>-<slug>/. The fixed-width timestamp means ls content/ lists videos in the order they were made. Claude knows today's date but not your machine's local time, and it will happily invent one — so a script owns the timestamp.
.claude/skills/hello-video/scripts/new-dir.mjs
#!/usr/bin/env node
// Create content/<YYYY-MM-DD>-<HH>-<MM>-<slug>/ and print its name.
// The model knows the date but not the local time, so this script owns the timestamp.
import { existsSync, mkdirSync } from 'node:fs';
import { join, resolve } from 'node:path';
import { fileURLToPath } from 'node:url';

const ROOT = resolve(fileURLToPath(import.meta.url), '../../../../..');
const slug = process.argv[2];
if (!slug || !/^[a-z0-9]+(-[a-z0-9]+)*$/.test(slug)) {
  console.error('ERROR  usage: new-dir.mjs <kebab-case-slug>');
  process.exit(1);
}

const d = new Date();
const p = (n) => String(n).padStart(2, '0');
const stamp = `${d.getFullYear()}-${p(d.getMonth() + 1)}-${p(d.getDate())}-${p(d.getHours())}-${p(d.getMinutes())}`;

let name = `${stamp}-${slug}`;
for (let v = 2; existsSync(join(ROOT, 'content', name)); v++) name = `${stamp}-${slug}-v${v}`;
mkdirSync(join(ROOT, 'content', name), { recursive: true });
console.log(name);
ROOT is resolved five levels up from the script (scripts → hello-video → skills → .claude → project root), so the script works no matter which directory Claude runs it from. If two videos with the same slug are created in the same minute, the second gets -v2.
7c. The validator
The validator is how you hand your quality bar to Claude. It exits with code 1 on any error, so a && chain stops before rendering a bad file, and Claude reads the messages and fixes the JSON.
.claude/skills/hello-video/scripts/validate.mjs
#!/usr/bin/env node
// Validate content/<dir>/hello.json. Exit 1 on any ERROR, so `&&` stops the render.
import { readFileSync } from 'node:fs';
import { basename, dirname, resolve } from 'node:path';

const file = resolve(process.argv[2] ?? '');
let doc;
try {
  doc = JSON.parse(readFileSync(file, 'utf8'));
} catch (e) {
  console.error(`ERROR  cannot read ${file}: ${e.message}`);
  process.exit(1);
}

const errors = [];
const folder = basename(dirname(file));
if (doc.id !== folder) errors.push(`id "${doc.id}" must equal the folder name "${folder}"`);
if (typeof doc.title !== 'string' || !doc.title.trim()) errors.push('title is missing');
if (!Array.isArray(doc.lines) || doc.lines.length < 3 || doc.lines.length > 6) errors.push('lines must have 3–6 items');
(doc.lines ?? []).forEach((l, i) => {
  if (typeof l !== 'string' || !l.trim()) errors.push(`lines[${i}] is empty`);
  else if (l.length > 40) errors.push(`lines[${i}] is ${l.length} characters, max 40`);
});
if (!(doc.secondsPerLine >= 1.5 && doc.secondsPerLine <= 4)) errors.push('secondsPerLine must be 1.5–4');

errors.forEach((m) => console.error(`ERROR  ${m}`));
if (errors.length) process.exit(1);
console.log(`OK     ${folder}: ${doc.lines.length} lines, ${doc.lines.length * doc.secondsPerLine}s`);
Notice the 40-character limit. It isn't about JSON validity; it encodes a design rule (a line must fit on a phone screen at 96 px). That's what validators are for in this series: they turn "Claude should remember to keep lines short" into "Claude cannot finish until lines are short."
7d. The render script
.claude/skills/hello-video/scripts/render.mjs
#!/usr/bin/env node
// Render content/<dir>/hello.json → out/<dir>.mp4 with the HelloVideo composition.
import { spawnSync } from 'node:child_process';
import { existsSync, mkdirSync } from 'node:fs';
import { join, resolve } from 'node:path';
import { fileURLToPath } from 'node:url';

const ROOT = resolve(fileURLToPath(import.meta.url), '../../../../..');
const dir = process.argv[2];
const props = join(ROOT, 'content', dir ?? '', 'hello.json');
if (!dir || !existsSync(props)) {
  console.error(`ERROR  no content/${dir}/hello.json`);
  process.exit(1);
}

mkdirSync(join(ROOT, 'out'), { recursive: true });
const out = join(ROOT, 'out', `${dir}.mp4`);
const r = spawnSync(
  'pnpm',
  ['exec', 'remotion', 'render', 'HelloVideo', out, `--props=${props}`, '--public-dir', join(ROOT, 'content')],
  { cwd: join(ROOT, 'remotion'), stdio: 'inherit' },
);
if (r.status !== 0) process.exit(r.status ?? 1);
console.log(`OK     out/${dir}.mp4`);
Here the JSON file is the props file: --props points straight at hello.json. In Part 3, a build step will sit between the two, because real footage needs measuring before it can be described in frames.
7e. The skill itself
.claude/skills/hello-video/SKILL.md
---
name: hello-video
description: Turn a short idea into a 9:16 text-animation video. Writes content/<date>-<time>-<slug>/hello.json, validates it, and renders out/<dir>.mp4 with Remotion. Use when the user says "make a hello video", "turn this into a quick text video", or wants to test the video pipeline.
---

# Hello Video

Turn an idea into a vertical video where 3–6 short lines appear one after another.

## Steps

1. **Pick a slug** from the idea: lowercase, no accents, kebab-case, at most 5 words.
2. **Create the folder.** Run the script — never type the date or time yourself:
   ```bash
   node .claude/skills/hello-video/scripts/new-dir.mjs <slug>
   ```
   It prints the folder name, e.g. `2026-10-10-09-30-hoc-remotion`.
3. **Write `content/<dir>/hello.json`:**
   ```json
   { "id": "<the folder name, exactly>", "title": "…", "lines": ["…", "…", "…"], "secondsPerLine": 2 }
   ```
   - `lines`: 3–6 lines, each under 40 characters, so they fit on screen.
   - `secondsPerLine`: 1.5–4.
4. **Validate, then render.** Fix every ERROR and re-run until clean:
   ```bash
   node .claude/skills/hello-video/scripts/validate.mjs content/<dir>/hello.json && \
   node .claude/skills/hello-video/scripts/render.mjs <dir>
   ```
5. **Reply** with the path `out/<dir>.mp4` and the lines you used. Do not paste the JSON.

## Hard rules

- `id` must equal the folder name. The validator checks it.
- Only write `hello.json`. Never edit anything under `remotion/` for a normal request.
Read it as Claude would. Each step says what to do and how to know it's done. The two places where Claude would otherwise guess — the timestamp and whether the file is good — are both handed to scripts.
Step 8: Run it
Start Claude Code in the project root and invoke the skill with an idea:
claude
> /hello-video giải thích Remotion trong 4 câu cho người mới
Claude reads the skill, picks a slug, runs new-dir.mjs, writes hello.json, validates it, and renders. A first render downloads a headless Chrome build for Remotion, so it takes a minute; after that, an 8-second video renders in seconds. Claude Code will ask permission the first time it runs each command. Approve it, or allow the skill's scripts permanently in .claude/settings.json:
{
  "permissions": {
    "allow": ["Bash(node .claude/skills/:*)"]
  }
}
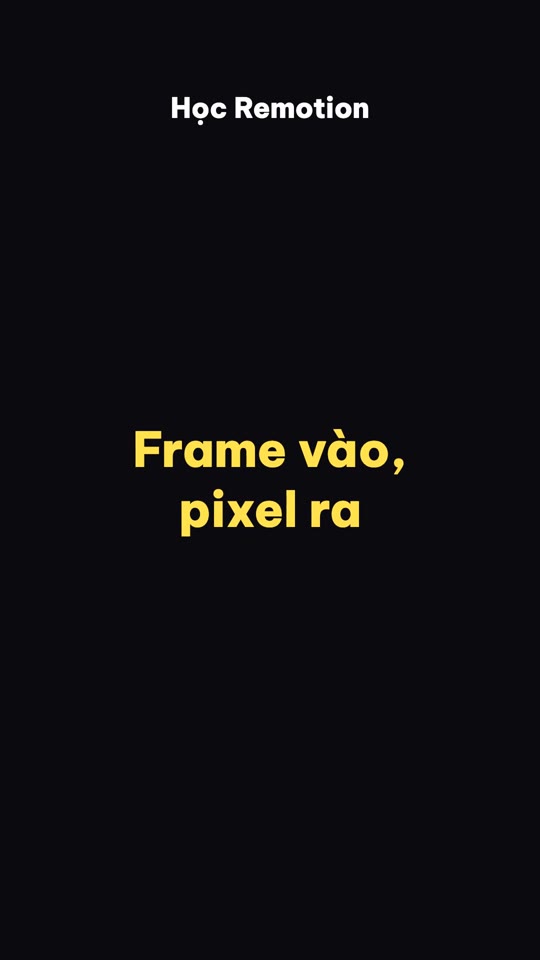
The result is out/<dir>.mp4, 1080×1920, with each line springing in and fading out:
Try to break it, too. Ask for a video with ten lines, or one line of 80 characters. You'll see Claude hit the validator, read the ERROR, shorten or split the lines, and re-run — without you saying anything. That feedback loop is the most important thing to understand in this whole series.
If something goes wrong
| Symptom | Cause | Fix |
|---|---|---|
ERR_PNPM_… or "Cannot find module 'remotion'" | Dependencies not installed | cd remotion && pnpm install |
| Accented letters show as boxes | Font loaded without the Vietnamese subset | Keep subsets: ['vietnamese', 'latin'] |
| "durationInFrames must be an integer" | A fractional frame count | Round every seconds × fps product |
| Claude types its own folder name | The skill's step 2 is too vague | Keep "never type the date or time yourself" in bold |
| The skill doesn't trigger from a plain request | Description doesn't match the wording | Add the phrases you actually use to description |
What you've built
You now have the complete skeleton every later part extends:
- A project layout with a clear home for skills, content, renders and the Remotion project.
- A composition whose length comes from its props.
- A skill whose creative part (writing the lines) is done by Claude and whose exact parts (folder, validation, rendering) are done by scripts.
The skills in the next parts are this same shape, scaled up. Part 2 builds the script-writing skill: a much richer JSON contract, a craft reference that teaches Claude how short-form scripts actually work, and a generator that turns the JSON into a shooting guide you hold next to the camera.